Background Knowledge
Automotive components typically have complex geometries and strict dimensional tolerance requirements. Traditional inspection methods may suffer from significant errors and low efficiency. In contrast, 3D cameras can quickly and accurately obtain three-dimensional shape and dimensional information of components, capable of detecting tiny defects and deviations, ensuring they meet design requirements, thereby enhancing the performance and reliability of automobiles.
Camera selection
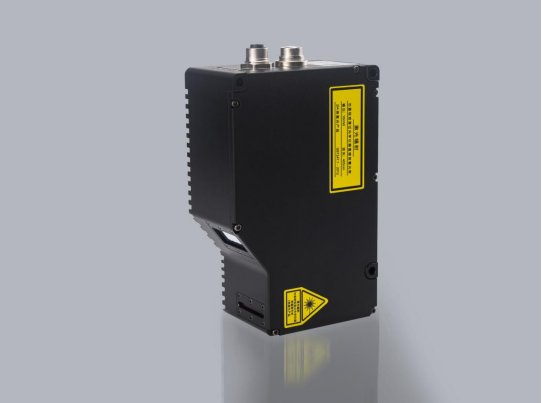
Today we will introduce the application case of Next vision tech LVM25 2 0 line laser 3D camera in automotive industry inspection!
The LVM25203D intelligent sensor from Next vision tech has a full-frame acquisition rate of 2500Hz, 1920 physical contour points, and uniform spacing sampling up to 4096 points for depth maps, with a maximum acquisition rate of 56000Hz. The products comprehensive performance is at an industry-leading level, making it an ideal choice for high-speed online inspection systems!
Test item 1
Workpiece information
· Material: aluminum alloy
· Color: silver white
Testing requirements
· Testing requirements: testing the height difference of the step of auto parts
· Accuracy requirement: repeated test accuracy 0.02mm
Testing environment and installation method
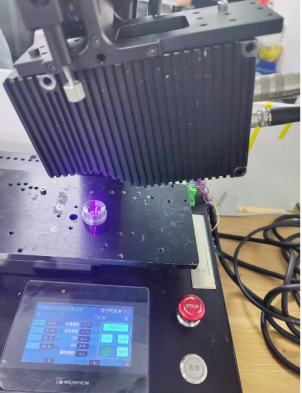
· After the camera is fixed, the product moves along the central straight line for scanning and measurement;
· The test platform needs to have a stable encoder signal output; Ethernet communication: TCP/IP
Image acquisition effect
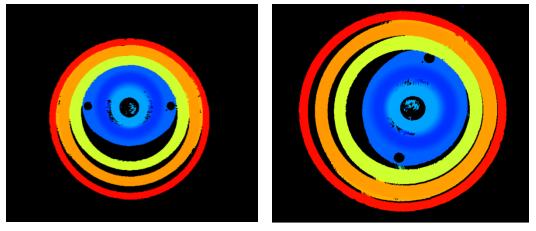
* The figure shows a screenshot of the depth map and a screenshot of the 3D map
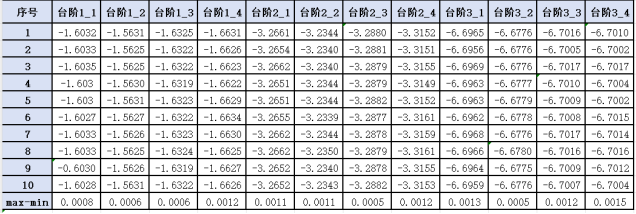
measured data
Test conclusion
· Customer requirements: the maximum value of 10 static repeatability data is 0.0015mm, which meets the requirements of customers (repeatability test accuracy is 0.02mm)
· Reducing human intervention, reducing the cost of testing, and improving the accuracy and consistency of testing
Test item 2

The picture shows that the aluminum wire is caused by the pressure injury of the joint, resulting in leakage

The picture shows that the machine processing residual winding whole circle aluminum wire is installed with O-ring and leaks after leakage
Testing requirements
· Testing requirements: overall inspection of the appearance of auto parts
Testing environment and installation method
· After the camera is fixed, the product moves along the center line for scanning measurement
· The test platform needs to have a stable encoder signal output Ethernet communication: TCP/IP
The effect of collecting metal iron filings in the groove
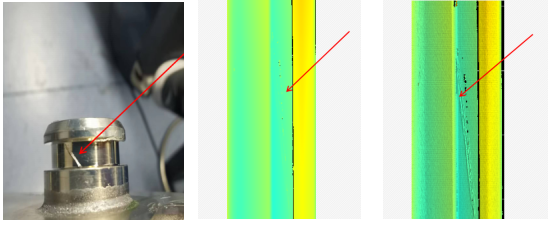
* The figure shows the physical image, point cloud and intensity map
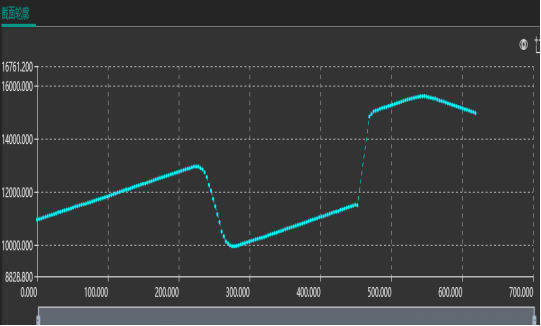
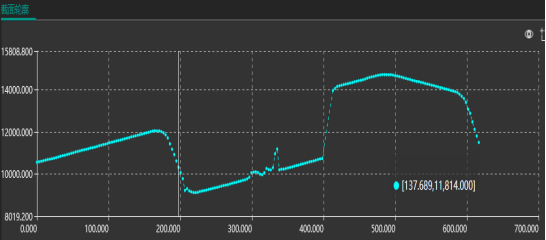
* The figure shows the normal section profile and the section profile inside the groove
The effect of metal iron filings on the groove wall
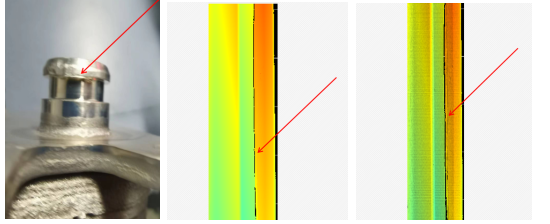
* The figure shows the physical image, point cloud and intensity map
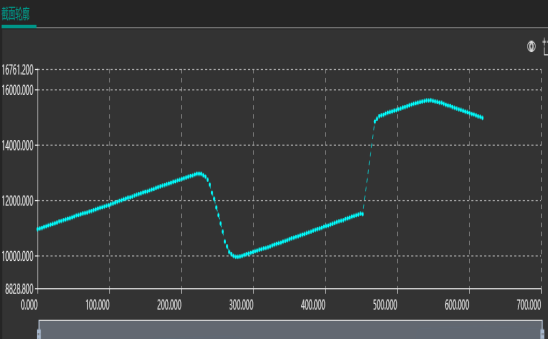
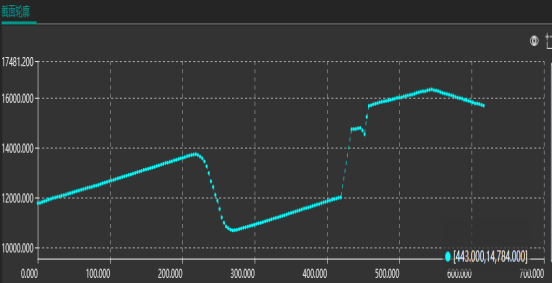
* The figure shows the normal section profile and the section profile in the groove
Test conclusion
· Can detect iron filings and scratches in grooves with a height of 0.3mm and above
· It can detect the width and height accuracy of the groove in 0.3mm and above
· It can clearly detect iron filings on the groove wall, and the height information is obvious
· Real-time monitoring and improved production efficiency
 2024/11/01
