1. Background knowledge
With the development of industrial automation , more and more companies are looking for machine vision application solutions, with the aim of allowing users to replace manual work with industrial automation detection.
Optical lens is an indispensable component in machine vision system , which directly affects the quality of imaging and the realization and effect of algorithm. Optical lenses can be divided into short-focus lenses, medium-focus lenses, and telephoto lenses from the focal length; wide-angle, standard, and telephoto lenses from the field of view ; HYPERLINK "https://baike.so.com/doc/4988822-5212456.html" \t "https://baike.so.com/doc/_blank" Automatic aperture fixed focus lens, manual zoom lens , automatic zoom lens, automatic aperture electric zoom lens, electric three variable (aperture, focal length, focus are all variable) lens, etc.
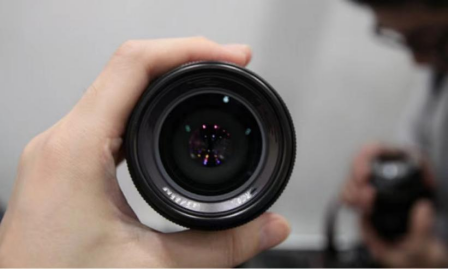
The quality of optical lenses mainly depends on the surface quality, and the detection of surface deviation and surface roughness are the main items to evaluate the surface quality of optical lenses. Today I will introduce to you the test case of LVM-2500 series cameras in the optical lens of Nextvision Technology!
2. Lens height test scheme
Nextvision's integrated 3D camera (LVM-2 510 ) cooperates with the detection system software, which has the characteristics of high speed and high precision. Select an ROI area for the convex area of the outer ring of the lens barrel wall for plane fitting, and then fit it on the lens pressure ring. Select a ROI area and detect the height from the flatness to the ROI area.
3. Adopt a camera
All-in-one 3D line laser camera LVM-2 510 .
The LVM-2 510 has 1920 actual physical contour points in the X direction . The acquisition speed of the full frame is 2500 frames per second , and the maximum can reach 56000 frames per second , which is suitable for high-precision detection .
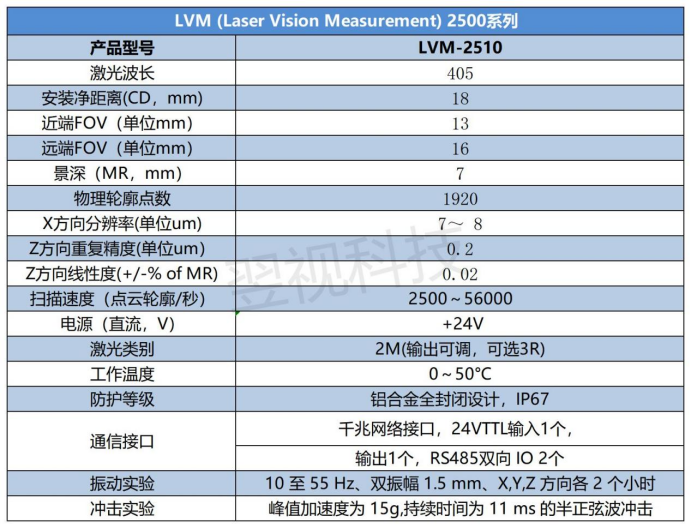
(LVM-2 510 series camera parameters)
3.1 Detection method
The height from the convex area on the outer ring of the lens barrel wall to the lens pressure ring, test 4 convex areas on a circle.
3.2 Testing Requirements
1、When the lens is not taken and placed, the repeatability accuracy is within 5um;
2. In the case of lens pick and place, the repeatability accuracy is within 10um;
3. The test efficiency requires a single test time within 1s;
4. The platform speed is required to be above 30mm/s;
The detection and sampling effect is as follows:
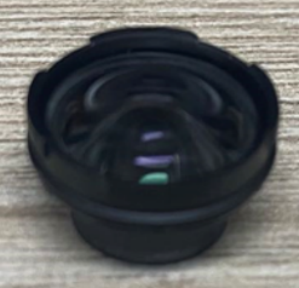
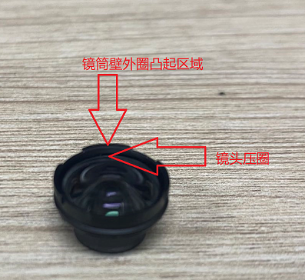
parts

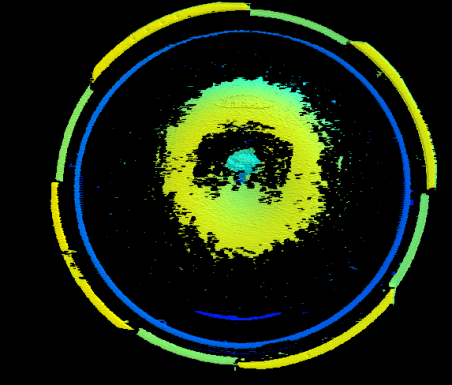
(point cloud map)
The following is a demonstration of the LVM-2500 series cameras in other applications (video):
https://weixin.qq.com/sph/ALUWLg
4. Nextsight Advantage
1)A full range of product lines with independent intellectual property rights: 3D cameras with high precision, high speed and high stability, the performance indicators have reached the international first-class level, the measurement repeatability is within 0.1 micron, and the scanning speed can reach up to 56000Hz;
2)It has the industry-leading 3D vision solution capabilities: the algorithm system is powerful and can be used for multi-channel point cloud data splicing to help customers achieve technological innovation;
3)Rich application scenarios: customized 3D cameras can be provided to meet various on-site inspection and measurement environments, and have been widely used in consumer electronics, new energy batteries, automobile manufacturing, sheet metal processing and other fields.
 2022/06/15
